Managing Boot Environments
Provides information about managing boot environments on FreeCORE.
FreeCORE supports a ZFS feature known as boot environments. These are snapshot clones that FreeCORE can boot into. You can only use one boot environment for booting.
Changing Boot Environments
Sometimes, rolling back to an older boot environment can be useful. For example, if an update process doesn't go as planned, it is easy to roll back to a previous boot environment. FreeCORE automatically creates a boot environment when the system updates.
There are two different methods for changing the active boot environment: using the web interface and through a Command Line Interface (CLI)
Web Interface
Go to System > Boot and click Options for the desired boot environment, then click Activate.
Reboot the system to activate the new boot environment.
Command Line Interface
Reboot the system.
When the welcome screen appears, press the key shown for the Boot Environments option in the boot menu.
Note
The Boot Environments options does not appear when no additional boot environments are present.
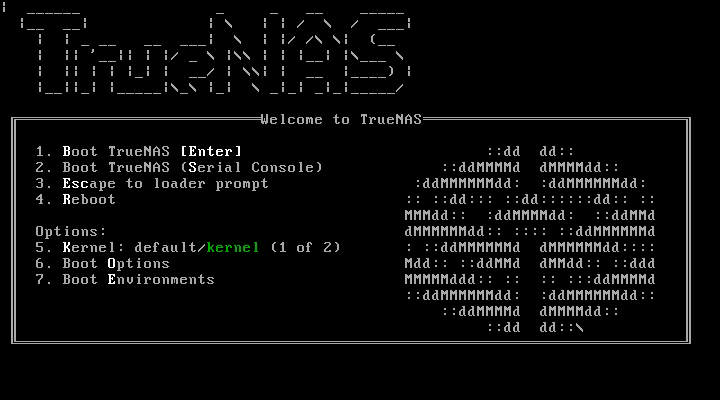
Choose the new boot environment to activate byt pressing the key for the Active: option.
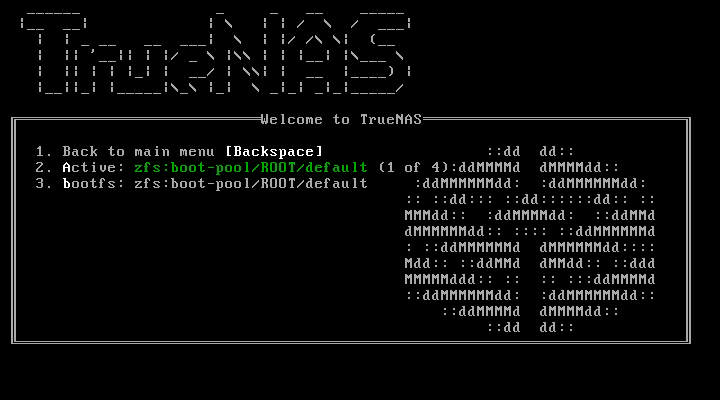
Press the key to cycle through existing boot environments. When you select the desired boot environment, press Backspace to return to the welcome menu, then press 4 to reboot the system.
Boot Actions
Go to System > Boot and click ACTIONS.
Add a New Boot Environment
Click Add to make a new boot environment from the active environment.

Name the new boot environment and click SUBMIT.
Note
You may only use alphanumeric characters, dashes (-), and underscores (_) in the Name.
View Stats/Settings
Click Stats/Settings to display statistics for the operating system device.
By default, FreeCORE scrubs the operating system device every 7 days. To change the default, input a different number in the Scrub interval (in days) field and click UPDATE INTERVAL.
View Boot Pool Status
Click Boot Pool Status to see the status of each boot-pool device, including any read, write, or checksum errors.
Scrub the Boot Pool
Click Scrub Boot Pool to perform a manual (data integrity check) of the operating system device.