Using the iSCSI Share
Describes how to use the iSCSI share in FreeCORE.
Using the iSCSI Share
Connecting to and using an iSCSI share can differ between operating systems. This article provides instructions for Linux and Windows.
Configuring Linux to Use the iSCSI Share
iSCSI Utilities and Service
First, open the command line and ensure that the open-iscsi utility is installed.
To install the utility on an Ubuntu/Debian distribution, enter command sudo apt update && sudo apt install open-iscsi.
After the installation completes, ensure the iscsid service is running with command sudo service iscsid start.
With the iscsid service started, run the command iscsiadm with the discovery arguments and get the necessary information to connect to the share.

Discover and Log In to the iSCSI Share
Run the command sudo iscsiadm \--mode discovery \--type sendtargets \--portal {IPADDRESS} where {IPADDRESS} is IP address (without curly brackets) you configured in the UI on the iSCSI > Portals > Add screen.
The output provides the base name and target name that FreeCORE configured.

Alternatively, to get the same output enter command sudo iscsiadm -m discovery -t st -p {IPADDRESS} where {IPADDRESS} is IP address (without curly brackets) you configured for the iSCSI share.
Note the base name and target name given in the output, since you need them to log in to the iSCSI share.
When a portal discovery authentication method** set to CHAP (on the UI Sharing > iSCSI> Portals screen), add the three following command lines to /etc/iscsi/iscsid.conf.
discovery.sendtargets.auth.authmethod = CHAP
discovery.sendtargets.auth.username = user
discovery.sendtargets.auth.password = secret
The user for command discovery.sendtargets.auth.username is set in the authorized access used by the portal of the iSCSI share (UI iSCSI > Portals). Likewise, the password to use for command discovery.sendtargets.auth.password is the in the iSCSI > Authorized Access screen Secret field. Without those lines, the iscsiadm does not discover the portal configured to use the CHAP authentication method.
Next, enter command sudo iscsiadm \--mode node \--targetname {BASENAME}:{TARGETNAME} \--portal {IPADDRESS} \--login, where {BASENAME} and {TARGETNAME} (without curly brackets) is the information from the discovery command.

Partition iSCSI Disk
When the iSCSI share login succeeds, the device shared through iSCSI shows on the Linux system as an iSCSI Disk.
To view a list of connected disks in Linux, enter command sudo fdisk -l.
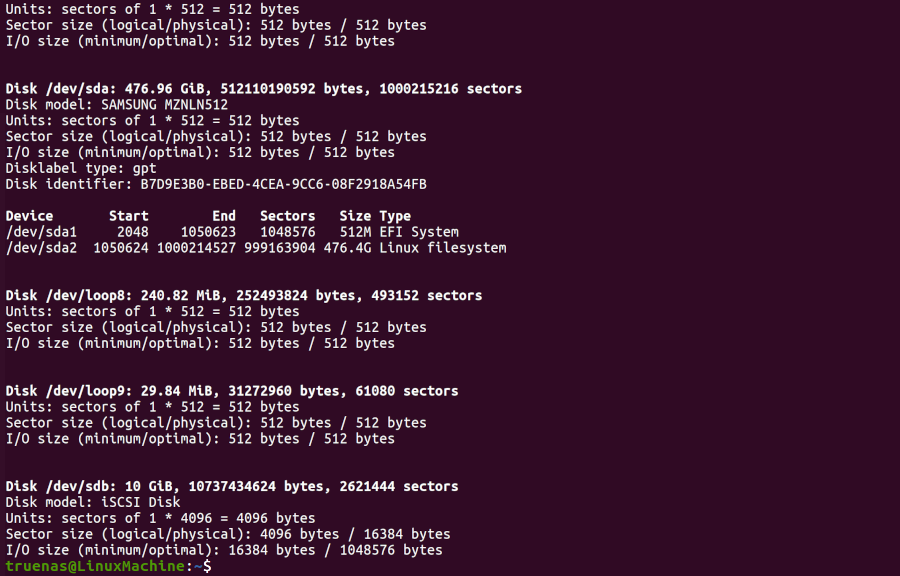
Because the connected iSCSI disk is raw, you must partition it.
Identify the iSCSI device in the list and enter command sudo fdisk {/PATH/TO/iSCSIDEVICE} where {/path/to/iSCSIDEVICE} (without curly brackets) is the path for your iSCSI device.
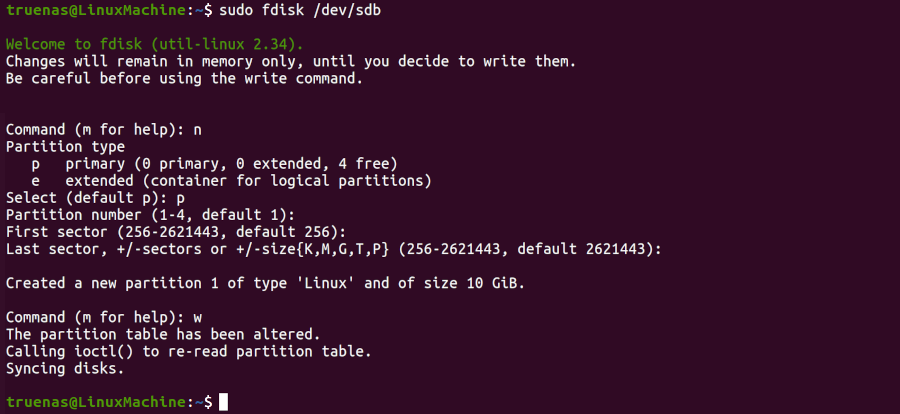
View the iSCSI device path in shell with the sudo fdisk -l command.
Use the fdisk command defaults when partitioning the disk.
Note
Remember to type w when finished partitioning the disk.
The w command tells fdisk to save any changes before quitting.
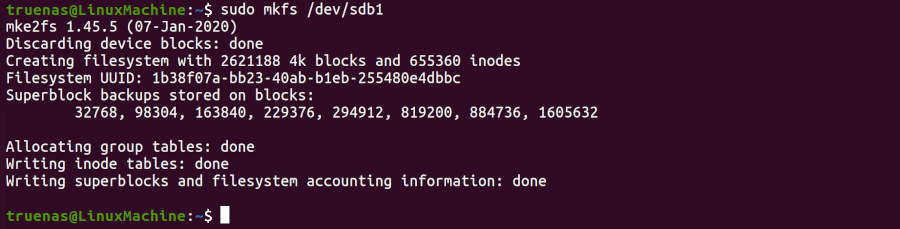
After creating the partition on the iSCSI disk, a partition slice displays on the device name.
For example, /dev/sdb1.
Enter fdisk -l to see the new partition slice.
Make a File System on the iSCSI Disk
Finally, use mkfs to make a file system on the new partition slice on the device.
To create the default filesystem (ext2), enter the sudo mkfs {/PATH/TO/iSCSIDEVICEPARTITIONSLICE} command where {/PATH/TO/iSCSIDEVICEPARTITIONSLICE} (without curly brackets) is the path to your partition slice on your device.
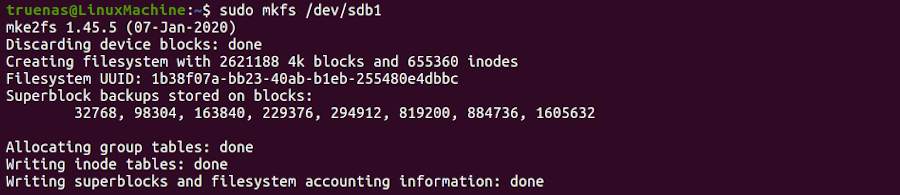
Mount the iSCSI Device
Now the iSCSI device can mount and share data.
Enter command sudo mount {/PATH/TO/iSCSIDEVICEPARTITIONSLICE} where {/PATH/TO/iSCSIDEVICEPARTITIONSLICE} (without curly brackets) is the path to your partition slice on your device.
For example, sudo mount /dev/sdb1 /mnt mounts the iSCSI device sdb1 to /mnt.
Configuring Windows to Use the iSCSI Share
To access the data on the iSCSI share, clients need to use iSCSI Initiator software. An iSCSI Initiator client is pre-installed in Windows 7 to 10 Pro, and Windows Server 2008, 2012, and 2019. Windows Professional Edition is usually required.
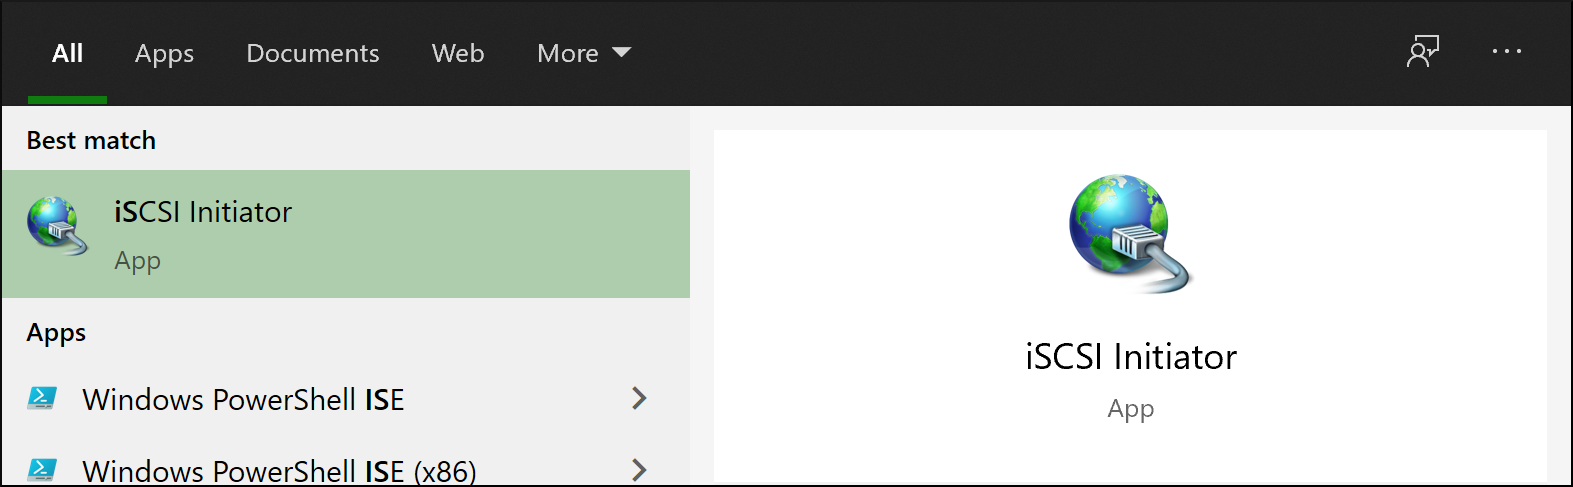
First, click the Start Menu and search for the iSCSI Initiator application.
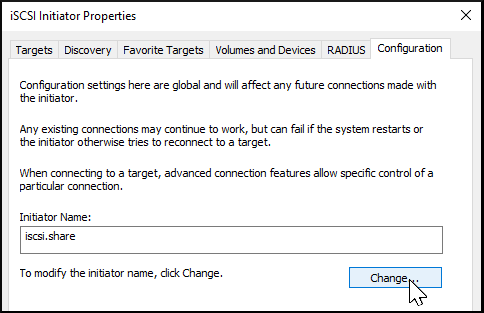
Next, go to the Configuration tab and click Change to change the iSCSI initiator to the same name created earlier. Click OK.
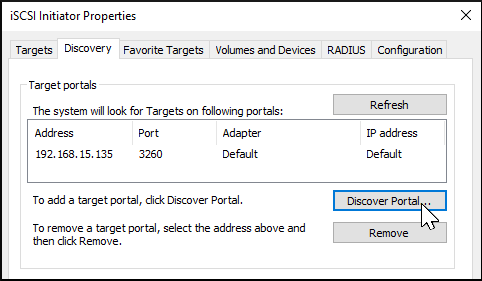
Next, switch to the Discovery Tab, click Discover Portal, and type in the FreeCORE IP address.
-
If FreeCORE changed the port number from the default 3260, enter the new port number.
-
If you set up CHAP when creating the iSCSI share, click Advanced..., set Enable CHAP log on, and enter the initiator name and the same target/secret set earlier in FreeCORE.
Click OK.
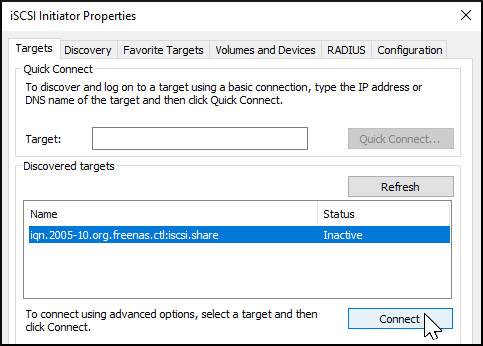
Go to the Targets tab, highlight the iSCSI target, and click Connect.
After Windows connects to the iSCSI target, you can partition the drive.
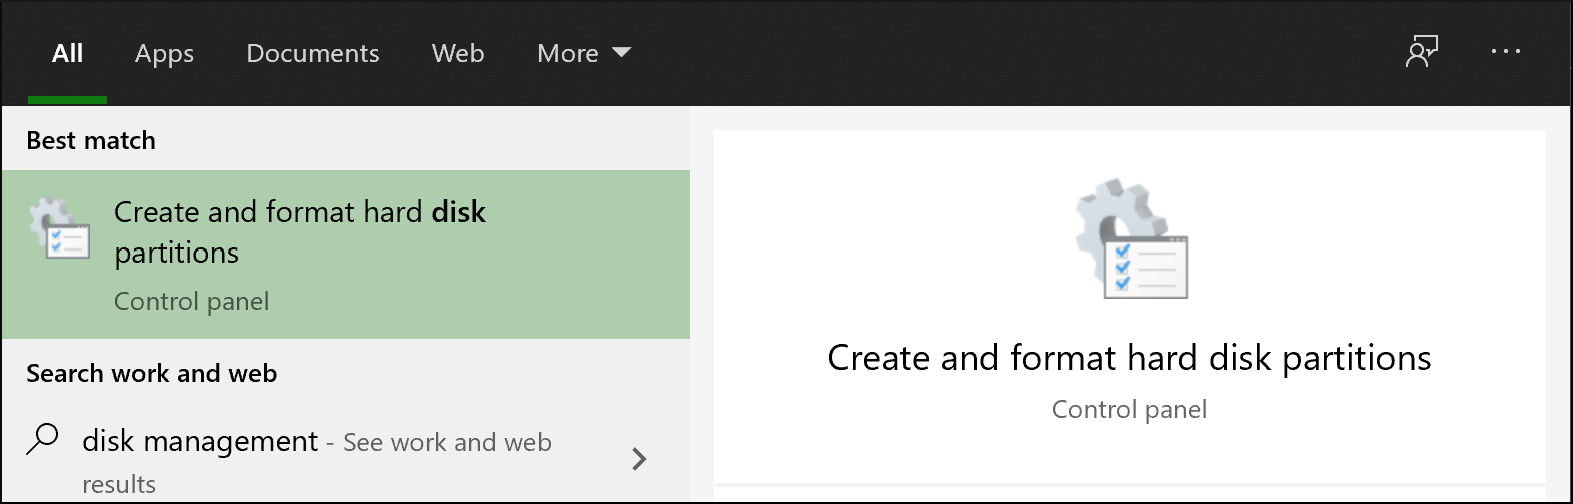
Search for and open the Disk Management app.
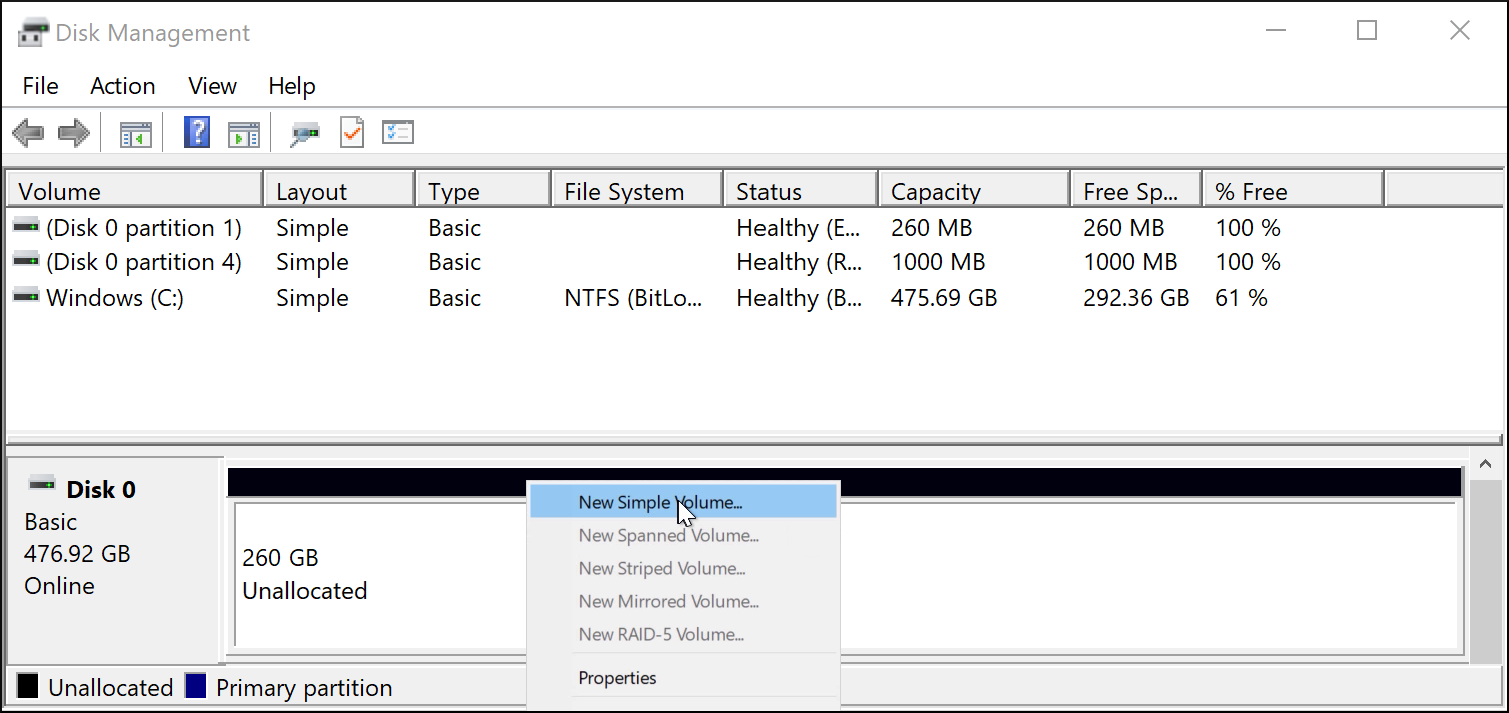
Your drive should currently be unallocated. Right-click the drive and click New Simple Volume....
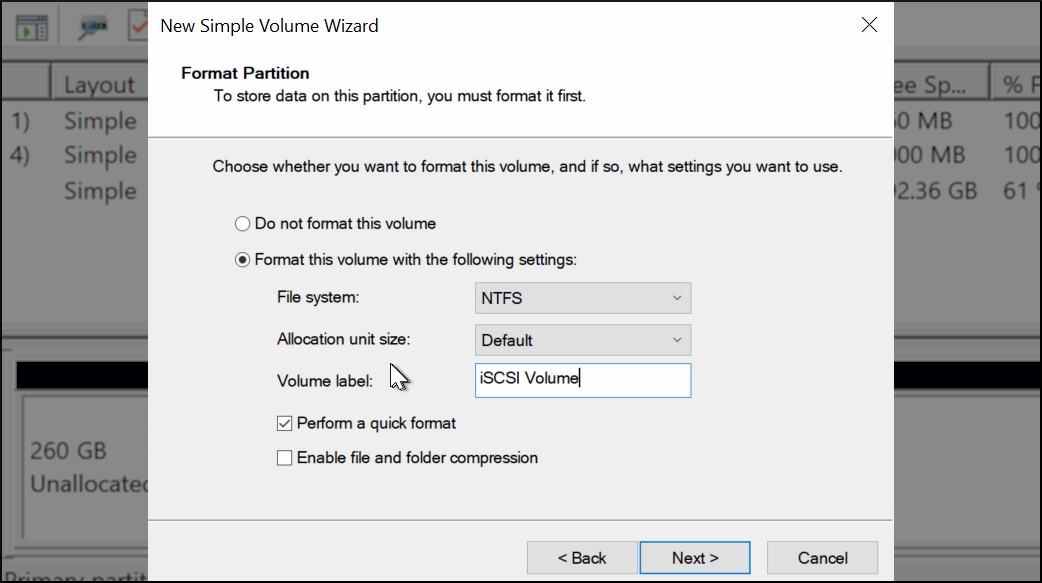
Complete the Wizard to format the drive and assign a drive letter and name.
Finally, go to This PC or My Computer in File Explorer. The new iSCSI volume should show up under the list of drives. You should now be able to add, delete, and modify files and folders on your iSCSI drive.
