WireGuard Server and Client
Configure the supported WireGuard server and client services in FreeCORE.
FreeCORE provides separate WireGuard server and WireGuard Client rows
on the Services screen. Use these service screens instead of creating
wireguard_enable or wireguard_interfaces tunables and post-init scripts.
The services own their interfaces and configuration files; a parallel manual
startup configuration can conflict with them.
Configure the WireGuard Server
Go to Services, find WireGuard, and open its configuration screen.
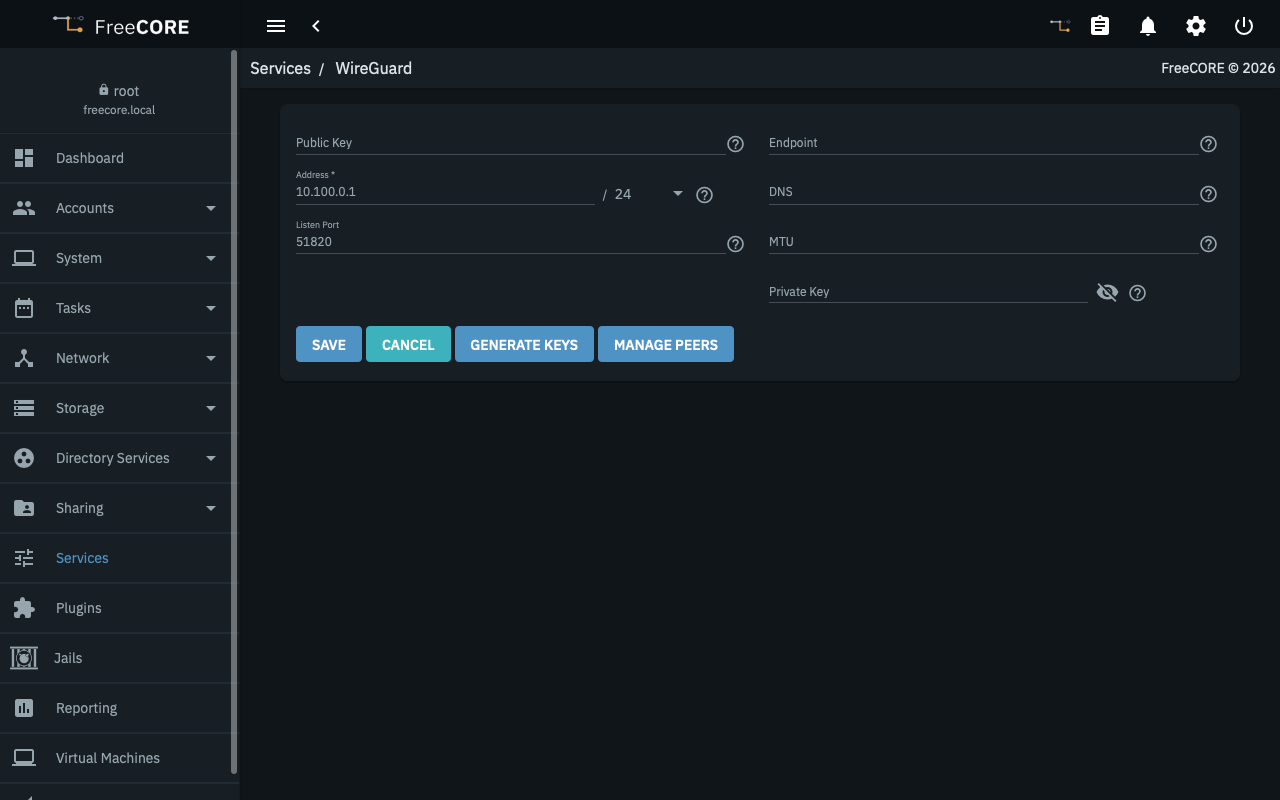
- Click Generate Keys to create the server identity. Import an existing private key only when retaining an existing WireGuard identity. Replacing the key later invalidates configurations already given to peers.
- Enter the server's tunnel Address with its prefix length, for example
192.168.50.1/24. - Set the UDP Listen Port. The default is
51820; make this port reachable from each peer. - Set Endpoint to the publicly reachable hostname or address written into downloaded peer configurations. DNS and MTU are optional.
- Save the server settings, then click Manage Peers.
For each peer, provide a name, the public key generated on that peer, and the
address or networks it may use inside the tunnel. A roaming client normally
uses one address such as 192.168.50.2/32. A pre-shared key and persistent
keepalive are optional.
After saving a peer, Download Configuration produces a client template.
The client private key is deliberately a placeholder: generate the private
key on the client and insert it there. Review AllowedIPs before using the
template. A value of 0.0.0.0/0, ::/0 sends all client traffic through the
tunnel and might cut off ordinary network access if routing is incomplete.
The shipped 15.0-U1.4 and 15.1-RC1 peer lists show Name, Allowed IPs and Enabled. They do not display last-handshake or transfer counters.
Return to Services to start WireGuard and select Start Automatically if the server should start during boot.
Configure FreeCORE as a Client
Go to Services, find WireGuard Client, and open its configuration screen.
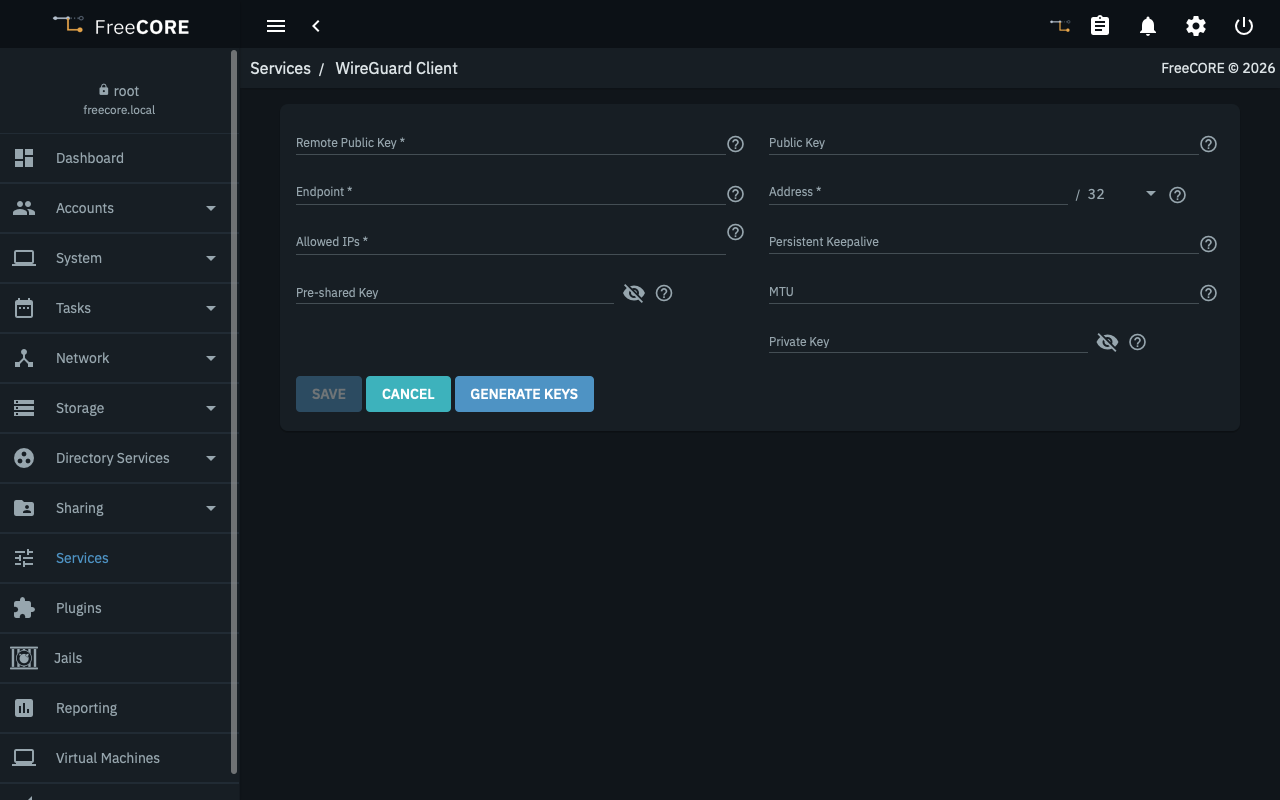
- Click Generate Keys, then give the displayed public key to the remote server operator so this FreeCORE system can be added as a peer.
- Enter the remote server's Public Key and reachable Endpoint.
- Enter only the remote networks that this system should reach in Allowed IPs.
- Enter the tunnel Address assigned to this system, including its prefix length. Add the optional pre-shared key, persistent keepalive, or MTU when required by the remote server.
- Save the settings, then start WireGuard Client from Services and select Start Automatically if it should start during boot.
Do not enter 0.0.0.0/0 or ::/0 in Allowed IPs unless the intention is
to route every connection from the storage system through the remote server.
An incorrect default route can make the web interface unreachable and require
local console access to repair.